Sod
Learn when to choose a sod lawnCost of a sod lawn
On average, a professionally-installed sod lawn costs about $3.50 per square foot, with an additional $2 per square foot for the sprinkler system.
A sod lawn is the most popular type of lawn for homeowners, because it is easier to establish than seed, has instant appeal, and is more reasonably priced than artificial turf. However, a sod lawn may not be the right choice in every circumstance. Learn more about the benefits and drawbacks of working with sod.
Pros and cons of sod
Pros:
- A sod lawn looks great as soon as it is installed. When you are writing a large check to your landscaper, it helps to be able to look out at your beautiful landscape and enjoy that finished look.
- After installation, there is no waiting period before you can walk on a sod lawn. A seeded lawn, by contrast, may need two or more months to establish before tolerating foot traffic.
- Because a sod lawn is already growing when it’s installed, it is better able to outcompete weeds than is a seeded lawn.
- Sod has a better success rate than seed. Grass seed needs warmth, plenty of regular water, protection from birds, and a lack of foot traffic to establish well, so there is more opportunity for things to go wrong than with sod.
- Turfgrass stays cool under the beating sun, so if you, your children, or pets like to walk barefoot on the lawn, real grass of any kind is a better choice than artificial turf.
Cons:
- A sod lawn is comprised of one variety of turfgrass rather than a blend of grasses. Any time you are growing a monoculture, there is more chance for disease than when growing a blend of grasses.
- There are usually only a few varieties of sod available in each region, so if you have conditions such as shade or difficult soil, you may not be able to tailor your turfgrass selection to your site.
- Any type of living grass will be more susceptible to damage from children and pets than will artificial turf.
- Living turfgrass, whether seeded or sod, will need water, maintenance, pest and weed control, and other ongoing maintenance.
- Sod is more expensive than a seeded lawn, both in labor and materials. For this reason, many people choose to use sod in the areas right around their house, and use a less costly hydroseeded lawn around the edges of their property.
Sod installation process
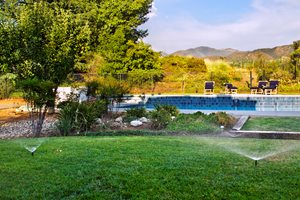
- If you plan on using a sprinkler system, it’s important to install it prior to laying down your sod.
- Smooth the soil and develop an initial grade that is about 2 1/2 inches below the desired finished level of your sod lawn.
- Remove all debris such as stones or roots, since they will otherwise be obvious once the sod is installed.
- If using, add edging next, whether steel, brick, concrete, or plastic. By setting the edging first, it makes it easier to get a consistent grade across the entire surface of the lawn.
- Topdress with a 2 inch layer of blended compost and topsoil. A topsoil/ compost mix has a fine texture and good nutrient balance to get your sod off to a strong start.
- Carefully rake the soil to achieve a perfectly smooth surface. The soil should be about a half-inch below the desired finished grade, such as the level of your patio.
- Apply lime to adjust the pH of your soil to be more hospitable to lawn.
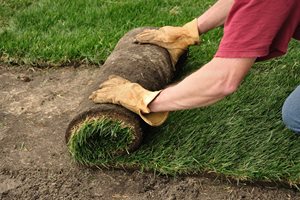
- Unroll the sod and settle it in tightly. Stagger your seams so the end of each roll lines up with the center of the previous roll.
- If on a slope, lay the sod perpendicular to the slope to avoid creating channels between the seams where water will flow. Begin laying sod at the bottom of the slope and work your way upwards.
- Apply a slow-release starter fertilizer like an 18-24-12 to encourage root growth.
- Keep sod consistently moist for the first two weeks, which may require watering two to three times per day for 20 minutes each time. Once your sod is established, you can reduce the water to only 1 inch per week.

 Backyards
 Front Yards


